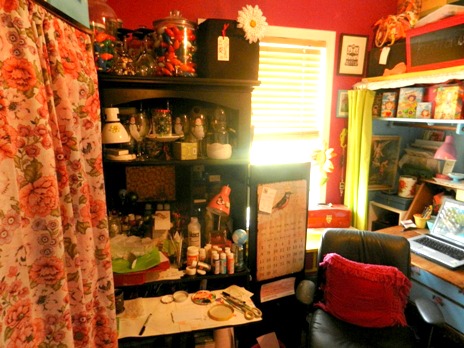
Welcome To My Colorful World!

Welcome to my colorful world. I am a happy (most of the time!) wife, mom, MeMaw, artist, and art teacher. I am a follower of Jesus Christ. I also love to create, cook, nest, decorate, entertain family and friends, laugh, collect vintage stuff, snuggle my cats and dog, play outdoors, and so much more! In addition to all this, I also publish an online magazine with my dear friend, called Mermaids of the Lake. Oh, and I love a big cup of coffee with cream, a dry martini, red wine, blingy jewelry, pink lipstick, blue fingernail polish. I love color! Beautiful colors inspire, motivate, and move me!!! What's my favorite color? I can't choose. I love them all! Yellow, pink, red, turquoise, blue, purple, orange, green and every variation in between!
Showing posts with label painting. Show all posts

Thursday, April 30, 2015

My Hand Painted, Mod Martini Glasses and a Couple of Cute Photo Bombers!

Martini Glass, shot from above

Of all the different mediums I use in my creations, one of my favorites continues to be painting on glass. I love the way the glass paints are sheer and vibrant. I love the way the light shines through them. I also really enjoy painting on objects with interesting shapes, such as wine glasses, water goblets, pitchers, large bowls, teapots, and especially, martini glasses! They are both elegant and whimsical.


This particular pattern is from my "Mod" line. The flowers are bright and cheerful and reminiscent of the Mod style of the 1970's. It is my very favorite pattern to paint, especially on martini glasses.


This pair was created to donate to a local JDRF charity event held last weekend. I really wanted to get a picture for this blog post before they were donated. I had a couple of furry, hooligan photo bombers!! Janie, who thinks she must be a part of everything I do was on the table in seconds! She decided to play it cool and just start eating my wheat grass as if that was what she intended all along.


Look at that tongue!


Bear did not want to be left out. He was on my lap just seconds after Janie jumped on the table. They are so funny and so darn predictable. I know it drives Bear crazy that his sister can just jump right up on things like the dining room table and the kitchen counters, while he is usually left whining at my feet. Poor Bear. He laughs when Janie gets squirted with the water bottle that I use to keep her away from my cooking. :)


Saturday, February 14, 2015

DIY: Repurpose Art Project - A Great Way to Create Beauty Out of Garbage - Scripture Cubes

My very favorite way to create continues to be making something beautiful out of something otherwise destined for the garbage or recycling bin. It feels so darn good! It's both challenging and thrifty, which appeals to me on so many levels. I've found that boxes that once held products or crackers, cereal, and more are a great way to create free (or almost free) canvases for painting or mixed-media collage. If I'm not recycling it, I'm saving it to create with. You can too!

For this project you will need
  • Face cream or other small box
  • Masking tape
  • White Acrylic Gesso (I use Liquitex brand)
  • Acrylic craft paints
  • Paint brushes
  • Stylist (for tiny dots)
  • Pencil and high quality eraser (I love a white graphic eraser)
A small face cream box makes the perfect cube for short Bible verses or quotes.

Cover entire the box with masking tape, being sure to cover the box openings and seams.

Paint with one coat of gesso to prepare the surface to paint.

Choose your colors of acrylic craft paints. I use plastic lids from yogurt and cream cheese containers as great little pallets.

Paint the box in an abstract way, blending and adding color. Tip: always use a bit of white when painting in this style.

 Paint entire cube
Lightly pencil in your verse.

Use black paint and a thin liner brush to write your verse.  I also added flourishes and vines, leaves, little berries, etc... Get creative. The stylist is a tool I am never without. It's a perfect little dot maker.

On my first box, I used a Sharpie. That proved to be a mistake. The surface of the cube is bumpy and the Sharpie also was not consistent with the darkness of the ink. So, I went back to what I love the most - a good old paint brush!


Here are the Bible verses I chose

Be still and know that I am God. ~Psalm 46:10

Joy comes in the morning. ~Psalm 30:5

For nothing is impossible with God. ~Luke 1:37

For we walk by faith not by sight. ~2 Corinthians 5:7

A cheerful heart is good medicine. ~Proverbs 17:22

Trust in Him at all times. ~Psalm 62:8

This is the day the Lord has made; we will rejoice and be glad in it. ~Psalm 118:24

In quietness and trust are your strength. ~Isaiah 30:15

"For I know the plans I have for you," declares the Lord, "plans to prosper you and not to harm you, plans to give you Hope and a future." ~Jeremiah 29:11

Follow Debbie's board Let's Get Creative 2 on Pinterest.

Saturday, October 13, 2012

Recycling, Repurposing - Creating With What You Have

I am saving boxes; cereal boxes, cracker boxes, soap and toothpaste boxes!

And toilet paper rolls to make crowns and other fun things too.

Love yourself to heal yourself

This one was an allergy pill box. I am going through these regularly this year!

I'm beautiful like me and you are beautiful like you!

And know you are wise...

Monday, October 8, 2012

Creating and Feeling Grateful!

My studio is messy, but in a good way,  because creativity is flowing!

Janie is cozy and content sleeping on the bed 

It is a beautiful, sunny October day and I am loving everything about it! the sun is shining brightly in my studio window. The view of the lake is amazing! My kitty is snoring next to me and I am playing my favorite artists on Pandora. I have been on a creative roll the last couple of weeks. I love it when that happens! I get an idea and then, boom!!! I have another! I'm thinking it could be because of the craziness of Pinterest- so much inspiration and all at your fingertips! I have been painting, re-purposing, collaging, and blogging here and on my other blog, Mermaids of the Lake.
Loving the sunny view today!

She is a unique little girl, happy with her uniquely beautiful self!

I am crazy for owls! Colorful, wise owls.

And sweet, big-eyed brown owls on rocks!

I'm also doing a bit of dreaming of The Most Wonderful Time of the Year!

I do love snow! (even though I am sooooo not ready for it)

Next I am off to pull all of my fall decorations out and have some fun decorating my home. What a great day!

Tuesday, October 2, 2012

Hoot Hoot! Toilet Paper Roll Owls!

I have been saving toilet paper rolls forever! There are so many fun art projects to do with them.

I LOVE owls. It all began in my childhood when my mom collected them. Can you guess which decade I grew up in? Yep - I am talking the 70's! Toilet paper roll crafts, including owls are all over blog-land and Pinterest. I knew I would dive into making me some toilet paper roll owls. Fun! I used acrylic paints, but you can cover them with paper or use tempera if you are making these with kids. Even fabric would work!

Janie even let this little pink girl snuggle up for a nap.


Follow Debbie's board Let's Get Creative 2 on Pinterest.

Saturday, August 18, 2012

Preschool Art: Pretty Painted Peacocks

Pretty Painted Peacocks is a fun, Eric Carl-inspired art project that is suitable for preschoolers, as well as older children, and is also a great lesson in cool and warm colors. The children and their parents will love this beautiful piece of art!

I was perusing the internet for a fun art project for my summer preschool art program. (read about my preschool art projects here) Note: this would be an awesome project for school-age children, as well.

I found this beautiful peacock project it on whatever: crafts and art blog. And, she found it on SmART Class. While many, or most of the projects I choose are my original ideas, I do look for inspiration elsewhere and strongly believe that Creative Inspiration should be shared to inspire others. Also, give credit where it is due!!! So, thank you to the two bloggers who helped make 39 adorable preschoolers happy artists!

You will need: 
  • Large white construction paper (for the peacock) 
  • Smaller white construction paper (for circles on feathers, irises of eyes, and for head and neck) 
  • Large colored construction paper (for the background) 
  • Tempera paints in warm colors (orange, red, and yellow) 
  • Tempera paints in cool colors (blue, green, and purple) 
  • Larger size paint brushes 
  • Template for feathers (I made mine from poster board) 
  • Circle template for spot on feathers 
  • Smaller circle template for iris of eye 
  • Almond eye-shape template for eyeball 
  • Large black Sharpie or other permanent marker to draw eyelashes and pupil 
  • Glue of your choice (we used Elmers-type white glue) 
  • Q-tips and paper plates (for gluing) 
  • Glitter and white glue 
  • Muffin tins (I used the disposable ones from the dollar store and have used the same ones for the past three years)
Teacher will need to make templates, using large poster board, for the feathers, spots on feathers, eye, and eyeballs. (see above supply list) Make enough for several children. When it comes time for the children to trace, using the templates, they can share.

Session One - Here is what we did: We talked about warm (we used red, orange and yellow) and cool colors (we used blue, green and purple) All of the older children knew what they were and loved shouting out their knowledge! They were so cute!

Pour blue, green, and purple tempera paints into muffin tins. (kids can share)

Instruct the children to fill the entire large, white sheet of construction paper. (This will be used for the feathers)
Use the back of the paintbrush to draw lines and swirls in the paint. Kids love this part and it makes for a more interesting final effect.

Set cool-color paintings aside to dry, and move on to the warm colors. Follow the same process as the cool-color paintings.

This next step was a hit! Paint each child's hand as shown above. Older kids can do their own.

Most kids were completely ticklish and squirmed and giggled. They loved the feel of the paint on their hands and loved the mess. They even enjoyed getting to move on to hand washing.

Help children to carefully stamp their hand on the smaller sheet of white construction paper. This will be the peacock's head. Paint a neck with the paintbrush. Refer to one of the finished peacock pictures for reference as to how long and thick to make the neck.

Let all paintings dry at least overnight. I only teach at this school once a week, so we had to finish the next part of the process a week later.

Session Two

Using a feather template, trace the feather shape five times on the cool-colors painting, using a piece of white chalk. (adult help, if needed) Cut out the feathers. For the sake of time and safety, teachers of younger children can do the cutting. Older children will enjoy this part with ease.

Trace five circle shapes, using the templates onto the warm-color paintings, and cut them out. Save a piece for the eyeball.
Provide paper plates with white glue on them and Q-tips for applying glue.

Glue one circle on the wide part of each feather. Arrange and glue each feather together, as shown above. Glue entire feather piece onto large, colored construction paper. (I offered two choices- green or magenta)

Cut out peacock head and neck. (printed hand shape)

Trace and cut out eye, using almond-shaped template. Trace and cut out eyeball from a scrap of the warm-colored painting. Glue eyeball to eye shape. Glue finished eye onto peacock head. Using large, black Sharpie, draw big, fun eyelashes. and pupil. (make sure there is no wet glue before you do this)

Finally, have each child dab glue on to their peacock where they want it to sparkle. Sprinkle with glitter of their choice. Shake off glitter.

The Masterpieces!!!


The little guy, who made this was only 2 1/2 and he missed the first week when we did the painting. So, we improvised and his teacher took him aside and assisted him in creating his own version using markers and left over scraps from other kids paintings. He loved his peacock and the entire process! Oh, he was adorable exclaiming gleefully during the whole project!

Proud Artists!


The paintings caused quite a stir in the hallway, drying. It was like a mini gallery showing.


Follow Debbie's board Art for Children on Pinterest.